Note: Since this post was written, ngrok has changed their pricing model and custom subdomains are no longer included with free accounts. If you have a basic account, or an older account (it appears this functionality remains on old accounts), you can still use custom subdomains. We'll look for another free solution for testing webhooks!
In our last post about Recurly, we gave you a primer on setting up the Recurly module in Drupal. However, if you need to thoroughly test your Recurly integration on a local environment, you’ll want to test the webhooks as well. Webhooks in Recurly are interchangeably called "push notifications." From the Recurly documentation:
Recurly can send webhooks to any publicly accessible server. When an event in Recurly triggers a webhook (e.g., an account is opened), Recurly will attempt to send this notification to the endpoint you specify.
We’ve used a service called ngrok to help set this up. Ngrok is a service which allows you to create secure tunnels to your localhost.
You’ll need:
-
A Drupal environment set up with the Recurly module.
-
A Recurly account set up and configured
Setting up ngrok
-
Create an ngrok account: https://ngrok.com/
-
Download ngrok: you can download and extract it (https://ngrok.com/download) or use a package manager. On Mac OSX,
brew cask install ngrokworked for me. This installed it into my applications folder, so I could just usengrokas the command instead of./ngrok. See this post for details on brew cask. -
Once you can run it per the instructions on the download page, you’ll need to do a one-time setup with your auth token. Here’s where we do things a little differently. We need ngrok to receive our webhooks from Recurly.
-
Start the ngrok public tunnel with HTTP AUTH and Host header rewrite set to your local development instance name:
./ngrok http -host-header=yourlocalinstance.dev -auth="username:password" -subdomain=your-recurly-subdomain 80yourlocalinstance.devis the path to your local instance.- the
username:passwordis made up by you to authenticate webhooks. your-recurly-subdomainis easiest to find in the address bar when logged into Recurly, you also need this to set up the Recurly module.
-
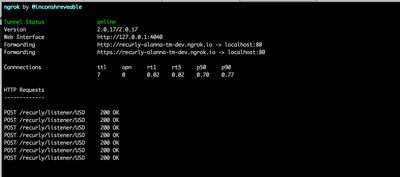
You should now see something like this in your shell:

Setting up Drupal
- Now we need to get the Drupal side of Recurly set up to receive the webhook notifications. Go to
config/services/recurlyin your local instance. - Under "Push Notification Settings," you’ll see the Listener URL key. It’ll be something like
yourlocalinstance.dev/recurly/listener/USD. Take note of this if you change it from this default.
Connecting ngrok to Recurly
- Now that we have ngrok set up, we need to set up the Recurly side to send the webhook notifications to the right place. Log into Recurly, and head to Developer>Webhooks on the left hand side, or
configuration/notifications/configure.
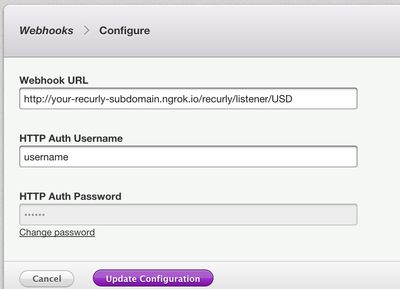
- Your Webhook URL should be the url you generated in your shell with the
ngrokcommand, with the Listener URL Key you noted in your Drupal settings appended to it. - The HTTP username and password are the
username:passwordcombination you used to start ngrok.
You should be all set up now. All webhooks will be sent to Webhook URL, which is using ngrok. ngrok is forwarding those requests to your local instance. Go ahead and make a change to a user’s subscription (or somewhere else you’re using Recurly’s webhooks) and take a look. You should see the requests coming through your shell:

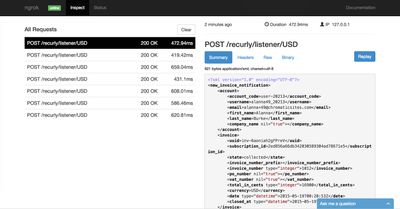
And you can also inspect them in your browser at http://localhost:4040/inspect/http:

That’s it! While ngrok is running, your local instance and Recurly can now communicate through webhooks, so you can test everything as though it were on your production server.
Roadmap Your Drupal 7 Transition
We’re offering free 45 minute working sessions to help you assess your organizations level of risk, roadmap your transition plan, and identify viable options!
Drop us a note, and we’ll reach out to schedule a time.


