
If you’re working on a site that needs subscriptions, take a look at Recurly. Recurly’s biggest strength is its simple handling of subscriptions, billing, invoices, and all that goes along with it. But how do you get that integrated into your Drupal site? Let’s walk through it.
There are a handful of pieces that work to connect your Recurly account and your Drupal site.
- The Recurly PHP library.
- The recurly.js library (optional, but recommended).
- The Recurly module for Drupal.
The first thing you need to do is bookmark is the Recurly API
documentation.
Note: The Drupal Recurly module is still using v2 of the API. A
re-write of the module to support v3 is in the works, but we have few
active maintainers right now (few meaning one, and you’re looking at
her). If you find this module of use or potential interest, pop into the
issue
queue and
lend a hand writing or reviewing patches!
Okay, now that I’ve gotten that pitch out of the way, let’s get started.
I’ll be using a new Recurly account and a fresh install of Drupal 7.35 on a local MAMP environment. I’ll also be using drush as I go along (Not using drush?! Stop reading this and get it set up, then come back. Your life will be easier and you’ll thank us.)
- The first step is to sign up at https://recurly.com/ and get your account set up with your subscription plan(s). Your account will start out in a sandbox mode, and once you have everything set up with Recurly (it’s a paid service), you can switch to production mode. For our production site, we have a separate account that’s entirely in sandbox mode just for dev and QA, which is nice for testing, knowing we can't break anything.
- Recurly is dependent on the
Libraries module, so
make sure you’ve got that installed (7.x-2.x version).
drush dl libraries && drush en libraries - You’ll need the Recurly Client PHP
library, which
you’ll need to put into
sites/all/libraries/recurly. This is also an open-source, community-supported library, using v2 of the Recurly API. If you’re using composer, you can set this as a dependency. You will probably have to make the libraries directory. From the root of your installation, runmkdir sites/all/libraries. - You need the Recurly
module, which comes with
two sub-modules: Recurly Hosted Pages and Recurly.js.
drush dl recurly && drush en recurly - If you are using Recurly.js, you will need that library, v2 of which
can be found here.
This will need to be placed into
sites/all/libraries/recurly-js.
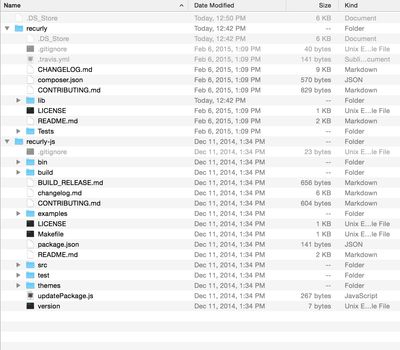
Your/libraries/directory should look something like this now:
Which integration option is best for my site?
There are three different ways to use Recurly with Drupal.
You can just use the library and the module, which include some built-in pages and basic functionality. If you need a great deal of customization and your own functionality, this might be the option for you.
Recurly offers hosted pages, for which there is also a Drupal sub-module. This is the least amount of integration with Drupal; your site won’t be handling any of the account management. If you are low on dev hours or availability, this may be a good option.
Thirdly, and this is the option we are using for one of our clients and demonstrating in this tutorial, you can use the recurly.js library (there is a sub-module to integrate this). Recurly.js is a client-side credit-card authorization service which keeps credit card data from ever touching your server. Users can then make payments directly from your site, but with much less responsibility on your end. You can still do a great deal of customization around the forms - this is what we do, as well as customized versions of the built-in pages.
Please note: Whichever of these options you choose, your site will still need a level of PCI-DSS Compliance (Payment Card Industry Data Security Standard). You can read more about PCI Compliance here. This is not prohibitively complex or difficult, and just requires a self-assessment questionnaire.
Settings
You should now have everything in the right place. Let’s get set up.
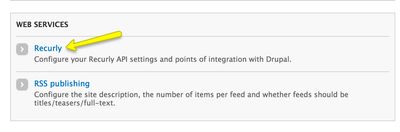
- Go to yoursite.dev/admin/config (just click Configuration at
the top) and you’ll see Recurly under Web Services.
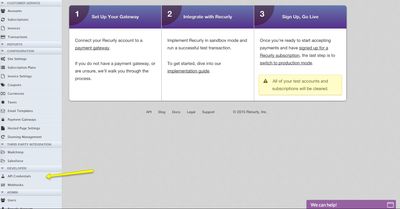
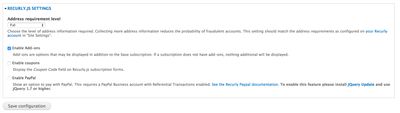
- You’ll now see a form with a handful of settings. Here’s where to
find the values in your Recurly account. Once you set up a
subscription plan in Recurly, you’ll find yourself on this page. On
the right hand side, go to API Credentials. You may have to
scroll down or collapse some menus in order to see it.
- Your Private API Key is the first key found on this page (I’ve
blocked mine out):
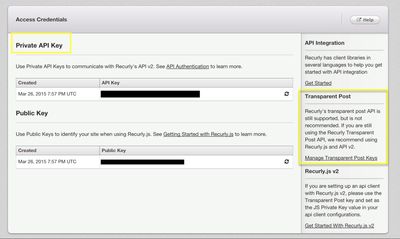
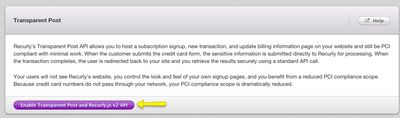
- Next, you’ll need to go to Manage Transparent Post Keys on the right. You will not need the public key, as it’s not used in Recurly.js v2.
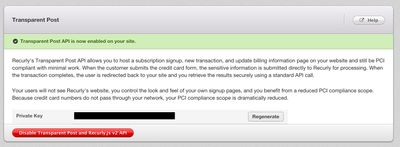
- Click to Enable Transparent Post and Recurly.js v2 API.
- Now you’ll see your key. This is the value you’ll enter into the
Transparent Post Private Key field.
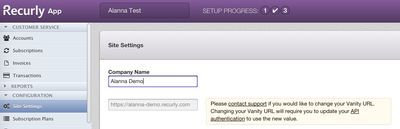
- The last basic setup step is to enter your subdomain. The help
text for this field is currently incorrect as of 3/26/2015 and will
be corrected in the next release. It is correct in the README
file,
and on the project page.
There is no longer a -test suffix for sandbox mode. Copy your
subdomain either from the address bar or from the Site
Settings. You don’t need the entire url, so in my case, the
subdomain is alanna-demo.
- With these settings, you can accept the rest of the default values
and be ready to go. The rest of the configuration is specific to how
you’d like to set up your account, how your subscription is
configured, what fields you want to record in Recurly, how much
custom configuration you want to do, and what functionality
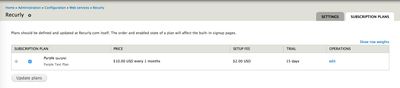
you need. The next step, if you are using Recurly’s built-in pages,
is to enable your subscription plans. In Drupal, head over to the
Subscription Plans tab and enable the plans you want to use on
your site. Here I’ve just created one test plan in Recurly. Check
the boxes next to the plan(s) you want enabled, and click Update
Plans.
Getting Ready for Customers
So you have Recurly integrated, but how are people going to use it on
your Drupal site? Good question. For this tutorial, we’ll use
Recurly.js. Make sure you enable the submodule if you haven’t already:
drush en recurlyjs. Now you’ll see some new options on the
Recurly admin setting page.
I’m going to keep the defaults for this example. Now when you go to a
user account page, you’ll see a Subscription tab with the option to
sign up for a plan.

Clicking Sign up will bring you to the signup page provided by
Recurly.js.
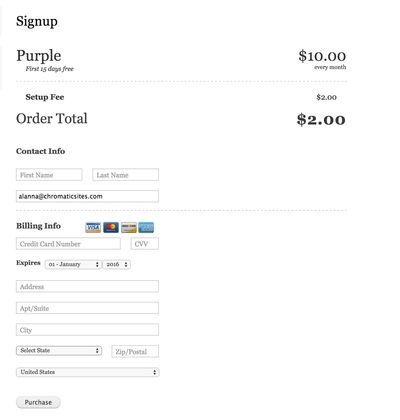
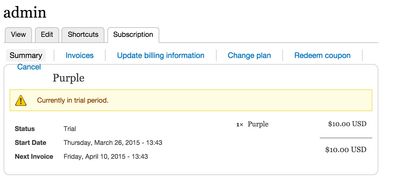
After filling out the fields and clicking Purchase, you’ll see a
handful of brand new tabs. I set this subscription plan to have a trial
period, which is reflected here.
Keep in mind, this is the default Drupal theme with no styling applied
at all. If you head over to your Recurly account, you’ll see this new
subscription.
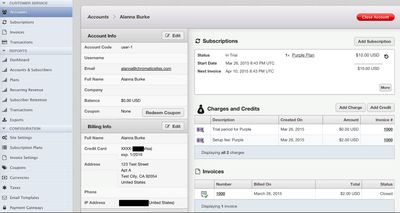
There are a lot of configuration options, but your site is now integrated with Recurly. You can sign up, change, view, and cancel accounts. If you choose to use coupons, you can do that as well, and we’ve done all of this without any custom code.
If you have any questions, please read the documentation, or head over to the Recurly project page on Drupal.org and see if it’s answered in the issue queue. If not, make sure to submit your issue so that we can address it!
Roadmap Your Drupal 7 Transition
We’re offering free 45 minute working sessions to help you assess your organizations level of risk, roadmap your transition plan, and identify viable options!
Drop us a note, and we’ll reach out to schedule a time.

