
Recently, Ryan blogged about a few CLI utilities that can really help improve your productivity. If I had to add one additional utility to his list, it’d be Vim. Vim is, the notoriously difficult-to-use, but remarkably powerful text editor that runs in a terminal (and of course the famous rival of Emacs).
Everything you’ve heard about Vim is true: it’s very difficult to learn, and it’s insanely powerful. These two characteristics almost balance each other out. You can probably do anything with Vim that you can do with another editor and do it faster and more efficiently. But you’ll need to take the time to learn it.
I can’t teach you much about Vim in a blog post. But there’s another reason for developers and programmers to bother with Vim: if you use it, you can almost work the whole day in your terminal. Most of the tools I need excepting browsers and other communications tools run in the terminal, so the more time I can spend in the terminal, the more efficiently I can work. Here’s how I do it.
Browsing files with NERDTree
I use Janus--a "Vim distribution"--to set up Vim. Janus provides a huge number of useful tools and a lot of default configuration on top of stock Vim (line numbers, commenting utilities, and much more), but the one I want to draw attention to here is NERDTree, a file browser for Vim (which, of course, can be installed without Janus).
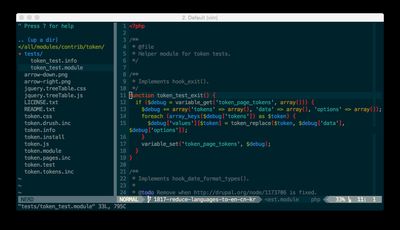
For me this is an essential feature, and it really helped with my adoption of Vim. With it enabled, opening a project is as simple as navigating to a directory and typing vim .. As with conventional editors, this file browser can be configured to toggle on or off. And as with everything else in Vim this functionality is accessed and used via the keyboard. What’s more, NERDTree offers a one-keystroke menu (just type m) for creating, moving, deleting, and copying files.
Running terminal commands from inside Vim
The editor is where I spend most of my time, so running Vim in a terminal is a first step. But sometimes we have to run perform tasks on the command-line such as, for example, using drush to clear a Drupal site’s caches. Vim provides a neat little solution that you can use to do this without even leaving Vim. Type :! plus the command you need to run:
:! drush cc all
This will run the drush command in a shell, display the output of the command, and prompt you to type ENTER to resume editing.
Leaving and returning to Vim without losing your place
Sometimes while you’re working, you need to run multiple commands or do something more involved than running a single command. Fortunately, there is a way to do this in the bash shell:
CTRL-z
This will actually move the Vim process into the background, returning you to your prompt to run whatever commands you need. To return to Vim--exactly as you left it--type:
fg
This returns Vim to the foreground so you can continue working.
Opening files
Everything else I’ve mentioned in this post should work on Linux systems of all sorts, but OSX has one nice command that I haven’t encountered elsewhere. The "open" command can be used to open files with the application of your choice. So if you’re working on a file that you need to try out in a browser, you can type something like:
open -a Firefox test-document.html
Transferring files with SCP
Since Git has become so popular not only as a way to manage, but also to deploy code, I find I transfer a lot fewer files than I used to. Nevertheless, it still happens that we need to move the occasional file up or down to a remote server. For this, I like to use SCP (SFTP is a good option for this too, but avoid FTP, it’s insecure).
Again, a full tutorial on SCP is far too involved for a blog post, but the basic syntax is like this:
scp path/to/local/file server:/path/to/remote/file
There are two things that make scp tricky to use (and which might take you away from your terminal!): the file paths and the authentication. I can’t help with the file paths, but you can stay in the terminal getting your work done by using SCP without usernames and passwords.
Authenticating SSH without passwords
This will change your life. It is possible to set up safe, secure SSH authentication without passwords. Even more exciting, once you have done this, it’s no longer necessary to use usernames and passwords with SCP. Once you’ve set up passwordless SSH access to a client server (under the host name e.g. ‘clientserver’), you can SCP a file to it as follows:
scp /path/to/local/file clientserver:/path/to/remote/file
No passwords or usernames required!
Editing files on remote servers
Last of all, we come to the reason that I decided to start using Vim in the first place. Simply put, Vim, or its predecessor Vi is installed on virtually every web server running Linux anywhere in the world.
This means that, on those occasions where it’s necessary for me to edit a remote file, I can usually use something similar to my usual editor. The version of Vi(m) on the remote server is usually much more stripped-down than my local development environment, but if you know how to use Vim, you usually find an editor installed on the server that you can use instead of having to SCP/SFTP transfer files up and down. Combine this with the passwordless SSH authentication, and it’s not only convenient, but very, very fast.
Is it worthwhile?
It can be. If you already use many command-line tools, and if you find that constantly needing to switch applications, or switching back and forth from mouse to keyboard interferes with your productivity, then Vim might be worth a shot. Conversely, if you already use Vim in the terminal and you’re not using command-line tools for almost everything else you can think of, you might want to start.
Now back to your terminal!

